Saturday, August 24, 2019

Use Indy SSL Connection in C++ Builder 6

In C++ Builder 6, the default indy doesn't support SSL security. I don't like it. I want secure communication between client and server in my application.
In order to do that, here is what we need to do:

1. Remove default C++ Builder 6 indy component. 

We need to remove the default indy in the default C++ Builder 6 by removing the "Internet Direct (Indy) for D6 property and components editor" component.
Default C++ Builder Indy Component
Go to C:\Program Files (x86)\Borland\CBuilder6\Include\Vcl and find files with prefix "id" and hpp extension. These are indy header files (idabout.hpp, idantifreeze.hpp, idantifreezebase.hpp, etc). Delete those files (you can save them somewhere save just in case something bad happen).

2. Install Indy 10

Today is 25th May 2019 and the link I use to download is https://indy.fulgan.com. Go to ZIP directory and download Indy10_5515.zip. Extract it to your own directory and go to that folder. Go to lib folder. Find a bat file corresponding to your version of C++ Builder. For me, I want to install it for C++ Builder 6, so I look for Fullc_6.bat. Run it from cmd. This process create a folder in parent folder named C6. Go there and you'll find the indy10 library.
fulgan.com zip folder


Copy all .hpp files to folder where you delete the original indy hpp files. The default is in C:\Program Files (x86)\Borland\CBuilder6\Include\Vcl directory. Copy the rest of files in the C6 folder to C:\Program Files (x86)\Borland\CBuilder6\Projects\Bpl directory.

Now open C++ Builder 6 and fire up menu Component>Install Packages. Add the component dclIndyCore60.bpl and dclIndyProtocols60.bpl. Your new component is now installed. You should have new tab Indy I/O Handlers, Indy Intercepts, Indy SASL tab at the most right of the component palette.

Indy 10 component

3. Install OpenSSL

This is the most important. You need OpenSSL library. Download OpenSSL from https://indy.fulgan.com. This time, go to SSL folder. There are many SSL that you can download from. Most of them don't work in my case. For me, even tough my PC is using 64 bit, I download the 32 bit because the 64 bit doesn't work for me. You can download them one by one and try which one works for you which one doesn't. If you get error "could not load SSL library", you probably still don't use the right dll. The version that I tried is openssl-1.0.0d-i386-win32-rev2.zip (it is inside archive folder). Extract it and copy them all. Create folder where you want to put your SSL library (ex: Program Files (x86)/OpenSSL). Paste the SSL files that you've copied. Now add PATH to the environment variable in windows and C++ Builder (Tools>Environment options>Environment variables).

Note: the version above 1.0.0d always show exception connection closed gracefully if you use version above 1.0.0d and you set the SSL version to sslvTLSv1_2. This is normal in release mode. However, in the debugger, you always get that exception pop up and it irritates me. To shut it up, go to Tools>Debugger Options>Language Exceptions. Add exception EIdSilentException and it won't pop up anymore (source: https://www.swissdelphicenter.ch/en/showarticle.php?id=1). 

Sunday, November 18, 2018

Auto Setup Level Selection Unity


This example is created using Unity 2018.2.14f. 

In Unity, when you have created a lot of scenes in different .unity files, sometimes it is tough to setup the level selection scene. For example, you create a lot of buttons to load the scene. In the button’s OnClick method, you will have to write the level name. This takes a lot of effort if you have more than 20 scenes and I’m super lazy to do that. So I want to setup all the button using script. When I click the button, it has to load the corresponding scene based on the parameter (ex: level2, level3, etc).


In order to do that, I created LevelSelectEditor.cs and LevelSelect.cs. LevelSelectEditor is a script that show a button to trigger the function where I want to generate all the buttons. Here is the LevelSelectEditor.cs:
using UnityEngine; 

#if UNITY_EDITOR
using UnityEditor;

// This script will copy one button in the level select screen,
// then paste its attribute from the button.
// Until the last button
[CustomEditor(typeof(LevelSelect))]
public class LevelSelectEditor : Editor
{
public override void OnInspectorGUI()
{
DrawDefaultInspector();

LevelSelect levelSelect = (LevelSelect)target;

      if (GUILayout.Button("Generate Level Text"))
{
         levelSelect.generateLevelText();
}

if (GUI.changed)
{
EditorUtility.SetDirty(levelSelect);
}
}
}

#endif

And this is the LevelSelect.cs
using UnityEngine;
using UnityEngine.UI;
using UnityEngine.Events;
using UnityEngine.Assertions;
using UnityEditor.Events;

// This class is used to create as many button as possible depends
// on the number of level in the game
public class LevelSelect : MonoBehaviour
{
   public int numLevel = 10;
   public GameObject button; 
   public GameObjectManager goManager;
   
   public void generateLevelText()
   {
      // first we need to make sure that Button game object is not null
      Assert.IsNotNull(button);   

      // hold the information of game object button
      string buttonName = button.name;
      Text levelText = button.gameObject.GetComponentInChildren<Text>();   

      // Button must have level text
      Assert.IsNotNull(levelText); // level text must not null   

      // delete children except first child
      while (transform.childCount > 1)
      {
         // delete it
         Object.DestroyImmediate(transform.GetChild(1).gameObject);
      }

   
      // we iterate from 2 because the first button is already created
      for (int i = 2; i <= numLevel; ++i)
      {
         // we want to change the parameter to match the level name of the scene       
         levelText.text = "level" + i;

         // we create new button and set the parent to the same as the first button object
         // the new button that we created is a copy of a button so it still has the same property
         // however, we need to change the onClick parameter to match the level name
         GameObject objButton = Object.Instantiate(button);
         objButton.transform.SetParent(this.transform);
         objButton.transform.localScale = Vector3.one;
   
         // rename the button
         objButton.name = buttonName;

         // we need the component of the Button
         var btnComponent = objButton.GetComponent<Button>();

         // now we remove the existing levelbuttonpressed method with wrong parameter
         UnityEventTools.RemovePersistentListener<string>(btnComponent.onClick, goManager.loadLevel);

         // then we change it to the new one
         UnityAction<string> action = new UnityAction<string>(goManager.loadLevel);
         UnityEventTools.AddStringPersistentListener(btnComponent.onClick, action, levelText.text);
      } 
   
      // set if back to default text
      levelText.text = "level1";
   }
}

You need to hook up the LevelSelect script to the content gameObject, set the properties (number of level, the button instance, the game object that has callback method), and you're done. The button onClick method will change to level1, level2, level3, etc automatically.

Saturday, December 26, 2015

Heyzap for applovin integration

In applovin integration heyzap, the sdk key that we have to set is deleted by heyzap. This makes us cannot show the ads.

When we import the applovin-unitypackage, we place the android.manifest at Plugin/Android directory. However, heyzap needs us to replace the android.manifest afterward and it will replace the android.manifest that we've set before. Therefore, we have to manually change the android manifest so our app can use applovin.

Here is the things that we need to add to android.manifest:
<activity android:name="com.applovin.adview.AppLovinInterstitialActivity" />
<activity android:name="com.applovin.adview.AppLovinConfirmationActivity" />


<meta-data android:name="applovin.sdk.key" android:value="YOUR_SDKKEY_HERE" />
    <meta-data android:name="applovin.sdk.verbose_logging" android:value="false" />


<uses-permission android:name="android.permission.WRITE_EXTERNAL_STORAGE" />
  <uses-permission android:name="android.permission.INTERNET" />
<uses-permission android:name="android.permission.READ_EXTERNAL_STORAGE" />
<uses-permission android:name="android.permission.ACCESS_NETWORK_STATE" />
<uses-permission android:name="android.permission.READ_PHONE_STATE"/>

Tuesday, June 3, 2014

Android emulator unity

I was struggling to find the fast android emulator for unity. I finally found the solution. I can use genymotion as the emulator. But the emulator needs to be configured little bit. I didn't know about this until I tried it. This solution works in my machine (Mac OSX 10.9.2). I haven't tried in windows machine. Here is what you have to do:

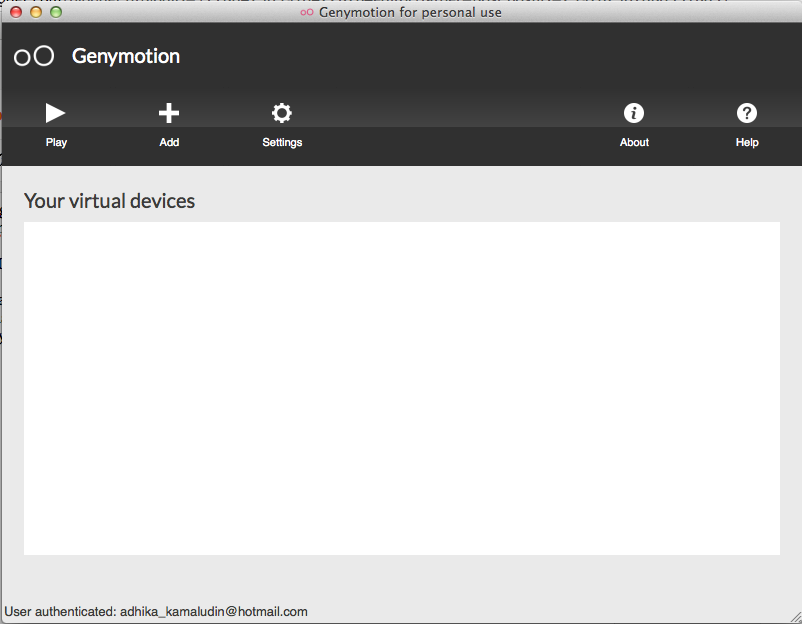
1. Download and install Genymotion. Here is how: https://cloud.genymotion.com/page/doc/#collapse4. The explanation is pretty straightforward. I assume you can install genymotion easily. After you successfully install genymotion, you should see this thing:


2. Add your virtual device emulator: https://cloud.genymotion.com/page/doc/#collapse5. Mine is Galaxy nexus - 4.1.1 - API 16 720x1280.

3. Run the emulator.

4. Now this is the tricky part. If you try to push .apk file to your emulator, it will show error message INSTALL_FAILED_CPU_ABI_INCOMPATIBLE. This is because Unity requires device that needs to support armv7 architechture. What you have to do is install the genymotion arm translation http://www.4shared.com/zip/4nRW7BS2ba/genymotion-arm-translation_v11.html. Just simply drag and drop the genymotion-arm-translation_v1.1.zip file to your emulator.

5. Restart your emulator.

6. Now, drag and drop your apk file to your emulator. This time it should work perfectly and it runs much faster than default android emulator.


Thursday, May 29, 2014

Unity Android back button problem

In my unity 4.3.4f1, the back button seems doesn't work. Sometimes, we want to make back button goes to the home screen or menu without exiting the application. There is a way to do this by simply calling android native code.

At first, we can use Input.GetKeyDown(KeyCode.Escape) to detect the back button input. I wrote the code inside update function:

// We also can write it in FixedUpdate function or whatever . The point is we want to check if the user press the back button
void Update()
{
   if (Input.GetKeyDown(KeyCode.Escape)) 
   { 
      // Do your code here . . .

   }
}


Now we want to execute what happens if user press the back button. Here is the common situation:
1. Quit the application
2. Go back to menu screen

1. Quit the application

This is pretty straight forward. We can simply call Application.Quit();

2. Go back to menu screen

This is common if you want to build game for android. You can call the android native code to do this. Add a macro to make sure you run it in android.

// Inside "Do your code here . . ."
#if UNITY_ANDROID
   // Get the unity player activity
   AndroidJavaObject activity = 
      new AndroidJavaClass("com.unity3d.player.UnityPlayer")
      .GetStatic<AndroidJavaObject>("currentActivity");

   // call activity's boolean moveTaskToBack(boolean nonRoot) function
   activity.Call<bool>("moveTaskToBack"true);

#endif

activity.Call<bool>("moveTaskToBack", true); The method signature is it takes parameter boolean and it returns boolean. So our call function signature must match the moveTaskToBack signature.

Introduction

Hello, my name is Adhika. I like to be called Jacky.

In this blog, I would like to post any thoughts, problem, or anything related to unity game development. Hopefully it is useful for some of you out there who has the same problem with me.